This article provides a brief guide to installing and operating the Z80Emu software. The Z80Emu program is a Z80/CPM80 emulator program for the Windows operating system.
Installing Z80Emu Program
To install the Z80Emu program first download the latest Z80Emu software. The downloaded "zip" file contains all the files needed to start the Z80Emu program. Copy the contents of the downloaded "ZIP" file to a new folder. If you are using Windows Vista do not create the folder under the "Program Files" folder as the Z80Emu program writes setup and disk files to its folder. Under Windows Vista programs can not modify files in a folder under the "Program Files" folder.
If the Z80Emu program is running on a Windows XP or Vista based system you may want to add the "Z80Emu.exe" to the program exception list of the Windows Firewall settings. The Z80Emu program can use a TCP connection as a console device on a user specified port and the built in remote disk server can use a UDP port.
As a last step you may want to create a desktop shortcut to start the main "Z80Emu.exe" program. At this point the Z80Emu program is ready to run.
Starting Z80Emu Program
The Z80Emu Program only requires five files to start up;
- Z80Emu.exe - main program file
- CPM22.hex - CPM80 2.2 image file in Intel 16 bit hex format.
- SKBIOS.hex - CPM BIOS image file in Intel 16 bit format.
- DiskA.cpmdsk - a Z80Emu CPM disk image file.
- Z80Emu.exe.manifest - used by XP and Vista to apply a style to the program
If the "DiskA.cpmdsk" file is not present when the Z80Emu program starts up a blank disk file will be created. The "DiskA.cpmdsk" file supplied in the program download contains the CPM80 system utilities, the source code for the CPM80 and BIOS as well as a small number of useful programs.
After starting the Z80Emu program the software can be used to execute CPM or be used as a simple Z80 emulation system. When the program starts up the CPU is in halt mode.

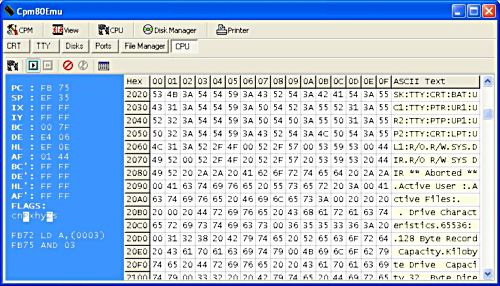
To use the Z80Emu program as a simple Z80 emulation system first select the CPU tab to display the CPU window. You can load a binary file or an Intel 16 bit hex file into the CPU memory using the load commands under the CPU selection from the main menu. The binary files should be compiled with the a start address of 100h. The CPU window allows both CPU memory and registers to be changed. Once the code to be executed is loaded in the memory and the CPU registers are set you may either single step through the code or press the CPU execute button to start the emulated program running. When the CPU window is displayed the Z80 emulation runs slowly due to the constant updates to the CPU register and memory displays. Selecting another display window (CRT, TTY, File Manage..) will greatly speed up the Z80 CPU emulation
.
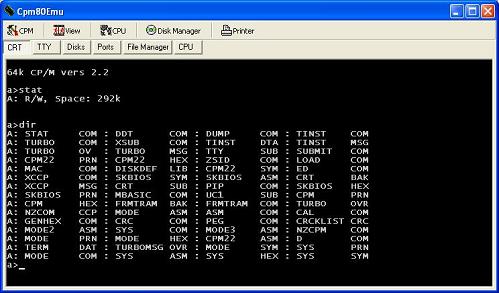
To use the Z80Emu program as a CPM80 2.2 emulation system first select the CRT tab to display the CRT window. By default the CRT window is the default console when running CPM. The default CPM console device can be changed in the PORTS window. Next select the "Insert Disk > Insert Disk A" option in the CPM main menu selection and select a CPM disk image file to use. If no disk image file is selected for drive "A" the program will automatically select the "DiskA.cmpdsk" file and insert it into drive "A". If the "DiskA.cmpdsk" file does not exist a new "DiskA.cmpdsk" file will be created.
Next select the BOOT CPM option under the CPM main menu selection. At this point the CPM operating system should load and present you with a command prompt. If CPM does not start up check the settings for the CPM Image Files in the DISKS window to make sure that both the "CPM Hex File" and "BIOS Hex FIle" settings point to the hex files supplied with the software.


